Unleash the engineer within and begin an inspiring journey of creativity! Constructing your marble racing track is a rewarding experience that blends fun with learning. Whether a beginner or a seasoned builder, mastering marble racing track construction techniques will empower you to create unique and exciting courses for your tiny athletes.

In this guide, we will explore the essential steps for constructing a marble race track., from planning your design and gathering materials to crafting obstacles and testing your creation. Get ready to transform everyday objects into a gravity-powered raceway that will leave you and your spectators cheering!
Planning your marble racing track construction
Planning is essential before constructing your marble race track to ensure a smooth, exciting, and challenging experience for your marbles. A well-thought-out design sets the foundation for a successful build.
Dream Big, Start Small: Brainstorming Your Vision
Begin by gathering inspiration from various sources. Explore photos and videos of renowned marble runs, study roller coaster designs, or draw ideas from natural landscapes like mountains, rivers, and forests. Online platforms such as Pinterest, YouTube, and marble racing forums are treasure troves of creative concepts.
Once inspired, grab a pencil and paper or use design software to sketch your ideas. Focus on capturing the overall layout, key features, and any exciting obstacles you envision. Choosing a theme can add an engaging element to your track, whether it’s a jungle adventure, space odyssey, medieval castle, or futuristic cityscape.
Measurements and Materials
First, assess the available space for your track. Determine whether it will be a compact tabletop creation or a sprawling floor design. Knowing your dimensions helps scale your design accordingly. Next, consider the materials you have or are willing to purchase. Cardboard is affordable and versatile, while wood offers durability.
You can also incorporate plastic tubes, straws, and other household items. Make a list of all necessary materials and tools, including cardboard tubes, boxes, tape, scissors, a craft knife, marbles, and any other items you plan to use.
Track Layout and Design
Decide on the starting point of your race, whether it’s a simple line or an elaborate starting gate. Plan the different sections of your track, including straightaways, curves, ramps, and drops, keeping in mind the desired speed and flow of the marbles. Consider the obstacles you want to include, such as jumps, loops, funnels, spinners, and see-saws, balancing challenge with fun.
Determine a clear and accessible finish line, perhaps adding a catch basin or a fun element like a bell or flag to mark the end of the race. If you’ve chosen a theme, brainstorm ways to incorporate it into your track design using colors, decorations, and themed obstacles to create an immersive experience.
Test Your Design
Before committing to a final design, build a smaller prototype to test your ideas. This helps identify potential problems and refine your design. If you’re tech-savvy, consider using online marble run simulators or software like Algodoo to virtually test your track design and see how the marbles would behave.
Investing time in planning and design ensures your marble race track is fun, engaging, structurally sound, and aesthetically pleasing. This thoughtful approach will tailor your track to your needs and interests, setting the stage for a successful and rewarding building experience.
Building the foundation
Creating a marble racing track starts with building a solid foundation. The base provides stability, ensures smooth marble movement, and is the canvas for your creative landscape. Here’s a guide to constructing a sturdy and functional base for your marble racing masterpiece, whether you’re using cardboard, wood, or other materials
Choosing the Right Base Material
Selecting the ideal base material depends on your budget, skill level, and your track’s desired size and complexity.
Cardboard is ideal for beginners and temporary tracks. It’s affordable, easily accessible, and simple to work with. Choose sturdy cardboard from shoeboxes or shipping boxes.
Wood: Wood is an excellent choice for a more durable and long-lasting track. Plywood or medium-density fiberboard (MDF) provides smooth surfaces and is easy to manipulate.
Foam Board: Lightweight and easy to cut, foam board is perfect for creating multi-level tracks with varying heights.
Preparing the Base
Determine the size and shape of your track and cut your chosen base material accordingly. Ensure the base is perfectly level to ensure smooth marble movement; use a level tool or eyeball it to check for any unevenness. If using cardboard, reinforce it with additional layers or strips of tape for increased strength and stability. Wooden supports or bracing can also be added for extra durability.
Creating a Solid Foundation
Cardboard Base: Using a cardboard box, reinforce the bottom and sides with extra cardboard or duct tape. Add support beams made from cardboard tubes or wooden dowels to prevent sagging.
Wood Base: Ensure all joints are securely fastened with screws or nails. Add a layer of felt or foam to the bottom to protect the surface it rests on and to dampen noise.
Foam Board Base: While lightweight, foam boards may need reinforcement. Glue additional layers together or use wooden dowels or skewers as support beams.
Elevating Your Track
Create elevated sections using cardboard tubes, wooden blocks, or other sturdy objects as support columns. Ensure these supports are firmly attached to the base to prevent the track from collapsing. Alternatively, stack multiple cardboard boxes to create different levels, ensuring each level is stable and securely attached to the one below it.
Adding Finishing Touches
To enhance the visual appeal of your track, consider covering the base with construction paper, felt, or other decorative materials. Add themed elements like miniature trees, buildings, or landscapes to personalize your track.
Following these steps, you can create a solid and reliable foundation for your marble race track, ensuring hours of safe and exciting play. A well-built base is the first step towards creating a truly impressive marble run masterpiece.
Constructing track sections
With a sturdy base, it’s time to craft the paths where your marbles will race, tumble, and compete for glory. Each section you build adds excitement and challenges to your marble track. Let’s explore various track sections you can create and techniques for building them.
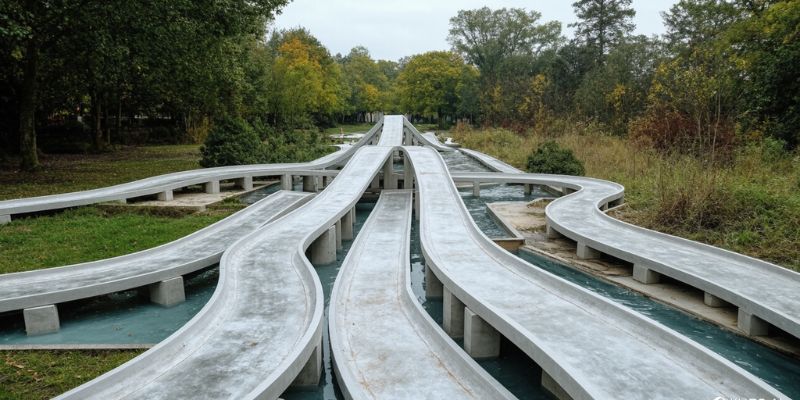
Straightaways: Unleashing Speed and Momentum
Straightaways are the most straightforward and essential part of any marble run, offering a clear path for marbles to accelerate and build momentum.
Materials: Cardboard tubes (cut in half lengthwise) are popular for their affordability and ease of use. Alternatively, you can use wooden dowels, craft sticks, foam pipe insulation, or plastic tubing for different aesthetics and performance.
Construction Tips:
Ensure a smooth, level surface to minimize friction and maximize speed.
Securely attach the track sections to the base with tape or hot glue.
For longer straightaways, connect multiple tubes or planks end-to-end.
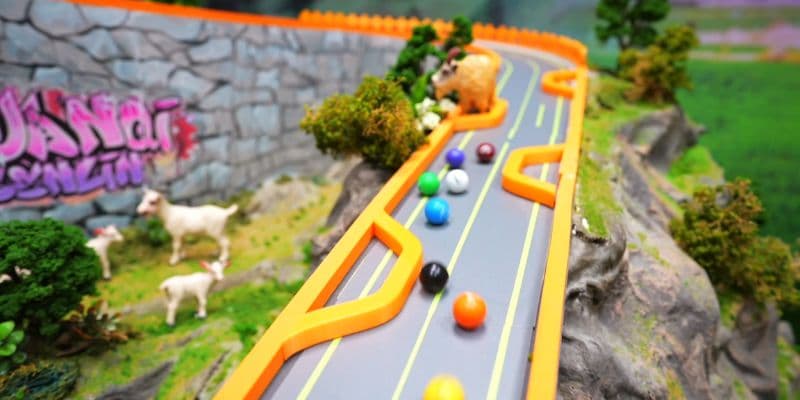
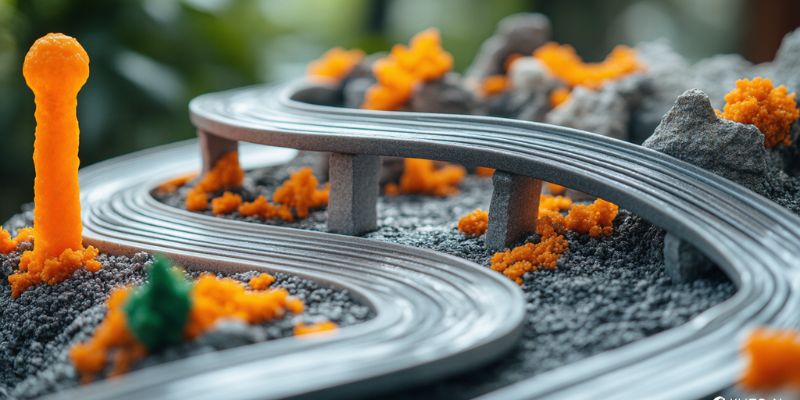
Curves and Turns: Navigating Twists and Turns
Curves and turns add excitement and challenge, requiring marbles to maintain speed and control while changing direction.
Types of Curves
Gentle Curves: Gradual bends that are easy to navigate.
Hairpin Turns: Sharp, tight turns requiring precise maneuvering.
Banked Curves: Curves with an elevated outer edge to help marbles maintain speed.
S-Curves: Two opposite-direction curves, adding complexity and visual interest.
Construction Techniques
Cardboard Strips: Bend and tape cardboard strips to create curves, adjusting tightness by varying the strip width.
Flexible Tubing: Use plastic tubing or gutters for smooth, flowing curves.
Notched Cardboard: Cut notches along the edges of cardboard strips to bend them into tighter curves.
Wooden Dowels: Bend thin wooden dowels into curves and secure them for durability.
Ramps and Slopes: Uphill Climbs and Thrilling Descents
Ramps elevate marbles to different levels, adding verticality and excitement. They also provide opportunities for gravity-powered acceleration as marbles descend.
Materials: Cardboard boxes, folded cardboard strips, wooden planks, or carved foam blocks can be used to create ramps.
Construction Tips
Angle: Steeper ramps lead to faster speeds, while gentler slopes offer more controlled descents.
Multi-Level Ramps: Combine ramps at different heights for a staircase effect or multi-level raceway.
Spiral Ramps: Create a spiraling ramp for a mesmerizing descent.
Tunnels and Tubes: A Journey into the Unknown
Tunnels add mystery and excitement as marbles disappear and reemerge.
Materials: Whole or half-cut cardboard tubes, paper or plastic wrap tubes, and foam pipe insulation can be used to create tunnels of various sizes.
Decoration: Decorate the inside with paint, markers, or glow-in-the-dark tape for added flair.
By integrating these different track sections, you can build a dynamic and engaging marble race track that provides hours of entertainment for all ages. Whether it’s the speed of straightaways, the challenge of turns, the thrill of ramps, or the mystery of tunnels, each element adds to the excitement and fun of your marble racing adventures.
Adding obstacles and features
Obstacles and features are the heart and soul of a marble race track, transforming a simple downhill roll into a thrilling, unpredictable journey. They challenge the marble’s speed, agility, and even creativity. Let’s explore some popular obstacles and features you can add to your DIY track
Jumps: Defying Gravity with a Leap of Faith
Jumps create exhilarating moments where marbles soar, testing their momentum and precision. You can have simple gap jumps, ramp jumps that launch marbles upwards, or step jumps that require marbles to hop over small ledges. To build a jump, use cardboard, wood, or foam to create a sturdy ramp and landing area.
Experiment with different ramp angles and lengths to adjust the jump distance and ensure smooth transitions to prevent marbles from bouncing off course. Imagine a ramp jump leading into a funnel, creating a thrilling combo as marbles launch and compete for position in the narrow passage.
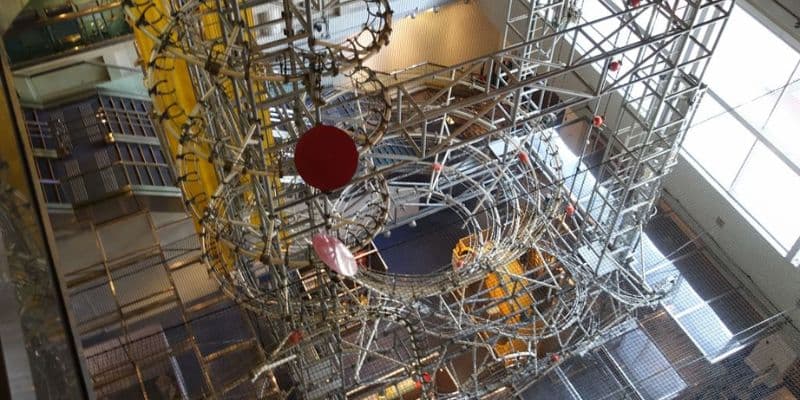
Loops: A Gravity-Defying Thrill Ride
Loops send marbles upside down in a circular motion, showcasing the power of momentum and centripetal force. To create a loop, carefully roll and secure cardboard strips or flexible tubing into a loop shape and attach it to the track.
Experiment with different loop sizes and angles for varying levels of difficulty. You can add double loops for a more intense challenge or vertical loops that start with a steep drop and end with a gradual ascent. Ensure the loop has a smooth entry and exit to prevent marbles from derailing.
Funnels: Bottlenecks and Strategic Maneuvers
Funnels create narrow passages that force marbles to compete for space and slow down, leading to exciting jockeying for position and potential collisions. Use a plastic cup or cardboard cone to create a funnel shape and secure it to the track.
You can add double funnels side-by-side for extra challenges or place a funnel at the end of a ramp for a sudden drop and speed boost. The funnel angle can significantly affect how the marbles interact, so experiment with different angles to change the race dynamics.
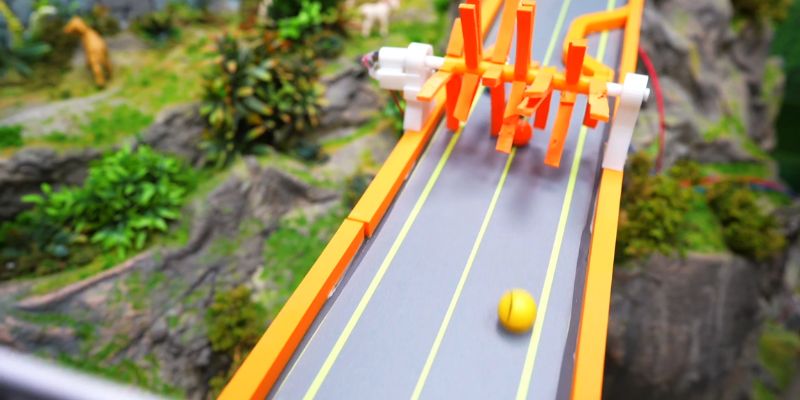
Spinners and Turntables: Unpredictable Twists and Turns
Spinners and turntables introduce an element of randomness and excitement to the race, as they can alter a marble’s direction or speed. Create spinners by attaching a cardboard circle or old CD to a skewer or dowel, and make turntables using cardboard or plastic.
Variations like paddle wheel spinners can push marbles in different directions, while multi-directional spinners create even more unpredictability. Ensure the spinner or turntable spins freely without obstructing the marbles’ path.
Other Creative Obstacles
Chicanes are S-shaped curves that require precise control and maneuvering. Crossovers are sections where tracks intersect, allowing for dramatic overtaking maneuvers. Bridges add a vertical dimension to the race by elevating track sections that marbles must cross. Use a plastic bottle with holes or a plastic wrap for a cascading waterfall effect.
Sand traps slow down the marbles, creating a challenging obstacle. Swinging gates move and require marbles to time their passage ideally, while teeter-totters tilt and launch marbles in different directions based on weight and position.
By incorporating these exciting obstacles and features into your DIY marble race track, you can create a unique and engaging experience for yourself and your fellow racers. The more creative and challenging your track, the more fun the race will be!
Testing and Troubleshooting Your Marble Race Track
Your marble race track is ready for action, but before you unleash the racing frenzy, it’s time for a crucial dress rehearsal: testing and troubleshooting. This isn’t just about ensuring your marbles roll smoothly; it’s about optimizing every twist, turn, and obstacle for maximum excitement and fairness.
Think of it like a practice run for your favorite sports team – you want to iron out any kinks before the big game. Start by sending a few test marbles down the track, carefully observing their journey. Do they zoom through effortlessly, get stuck, fly off course, or slow down unexpectedly? Pay attention to how they interact with each obstacle, ensuring they easily clear jumps, navigate loops, and conquer funnels.
If you notice any hiccups, don’t worry! Troubleshooting is part of the creative process. A little tweaking can go a long way. For instance, some sanding or tape might smooth out rough edges if marbles are stuck. Adjusting ramp angles or adding barriers can keep them on course if they’re flying off the track. If speeds are inconsistent, check for debris or uneven surfaces that might be causing friction.
For multi-lane tracks, ensure fairness by meticulously measuring each lane and adjusting obstacles accordingly. You might even want to time each marble’s run to ensure a level playing field.
Think of this testing phase as a collaboration between you and your track. It’s an opportunity to learn, adapt, and perfect your design, creating a thrilling and fair marble racing experience. So, let those marbles roll, observe their journey, and make adjustments as needed. Remember, a well-tested track is the key to a truly epic marble racing showdown.