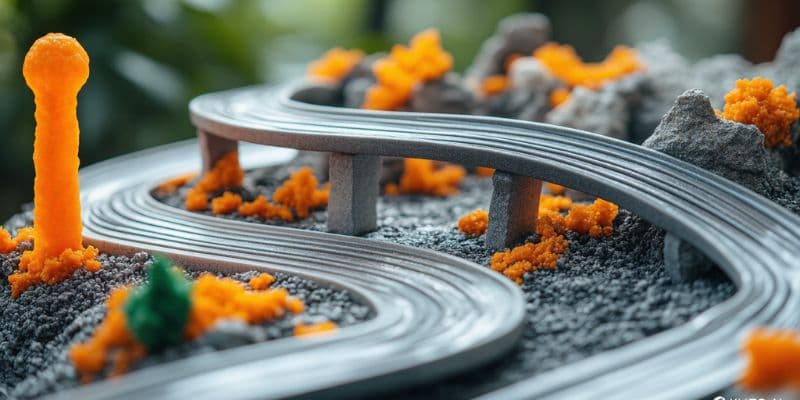
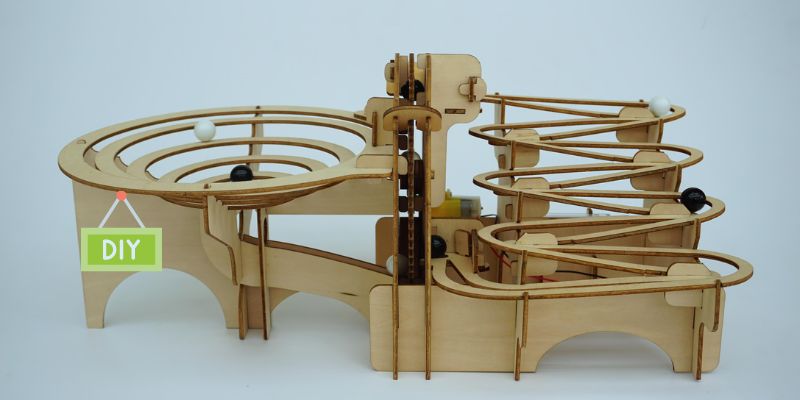
Ready to embark on a gravity-powered adventure? Building your own DIY marble race track is a fun and rewarding project that sparks creativity and brings the thrill of racing right into your home. Whether you’re a parent looking for a fun activity for the kids or a seasoned enthusiast looking to experiment, crafting a DIY track is easier than you think!
In this guide, we’ll dive into the exciting world of DIY marble race tracks. You’ll learn what materials you need, discover step-by-step instructions, and find tips to design a track that will excite your marbles. We’ll even show you how to share your masterpiece with the world. So, let’s get started and create your own epic marble racing adventure! The following section will explore why you should consider building your own marble race track.
Why should build a DIY marble race track
Building your own marble race track is more than just a fun activity; it’s an adventure in creativity, engineering, and learning. While pre-made marble run kits offer convenience, the DIY approach unlocks a world of possibilities explicitly tailored to your imagination and resources. Let’s explore why you should consider creating your own marble race track
Fuel Your Imagination
Designing a DIY marble race track gives you a blank canvas to bring your ideas to life. Without the limitations of pre-designed pieces or instructions, your creativity can soar. Picture a twisting, turning track inspired by a jungle adventure, a towering structure mimicking a cityscape, or a multi-level maze with hidden tunnels and secret passages. As the architect, engineer, and storyteller, you control every design aspect. The only limit is your imagination.
Ignite a Passion for STEM Learning
Marble race tracks are fantastic tools for hands-on STEM learning. Building your track presents real-world challenges that require creative problem-solving and critical thinking. You’ll interactively explore physics concepts like gravity, momentum, friction, and potential/kinetic energy.
Experiment with different ramp angles, track surfaces, and marble weights to observe their effects. Engineering skills come into play as you design and construct a sturdy track, learning about structural integrity, stability, and material selection. Math skills are sharpened as you measure dimensions, calculate angles, and predict race outcomes.
Forge Stronger Bonds
Building a marble race track is an excellent family bonding activity. It’s an opportunity to collaborate, share ideas, and create something unique. Collaborate on the design, gather materials, and celebrate the thrill of watching your marbles race to the finish line.
Save Money and Repurpose
DIY marble race tracks are budget-friendly. Everyday household items like cardboard tubes, boxes, straws, and even old toys can create an exciting and challenging course. This approach saves money and reduces waste, teaching children the importance of resourcefulness and sustainability.
Customize to Your Heart’s Content
Personalizing your DIY marble race track is one of the greatest joys. Choose your favorite colors, themes, and materials. Decorate your track with paint, markers, stickers, or miniature figurines. The possibilities are endless, allowing you to create a track that is truly your own.
Level Up Your Skills
Building a marble race track is a journey of learning and growth. As you experiment with different designs and materials, you’ll develop your engineering skills, problem-solving abilities, and creativity. Each track you build becomes a stepping stone to the next, pushing you to create even more impressive and challenging courses.
Whether you’re a parent looking for a fun and educational activity for your kids or someone who enjoys creating and tinkering, building a DIY marble race track is a rewarding experience with countless benefits. So, unleash your imagination and embark on your own marble-racing adventure!
Materials to build a DIY marble race track
One of the most thrilling parts of creating a DIY marble race track is the chance to get creative with everyday household items. Your recycling bin, toolbox, and even your junk drawer can become a goldmine of potential building materials. Let’s dive into the essential and optional supplies you can use to construct your gravity-powered masterpiece.

Essential Building Blocks
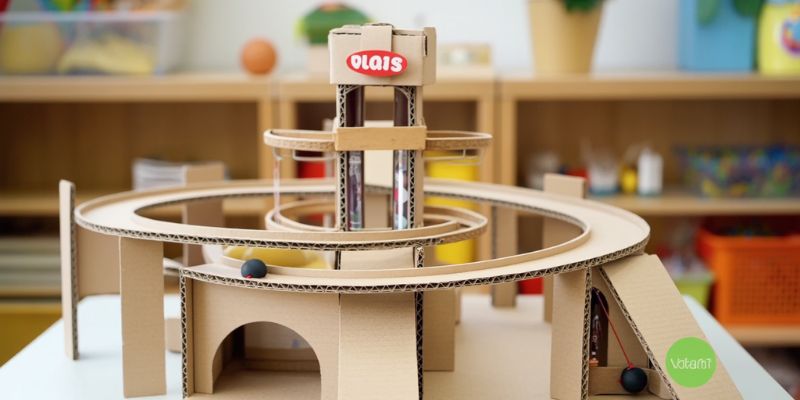
Cardboard Tubes: These are the backbone of your marble race track. Gather various sizes, from the short and sturdy toilet paper rolls to the long and wide wrapping paper tubes. They can be used to create ramps, chutes, tunnels, and structural supports.
Cardboard Boxes: Cereal boxes, shoeboxes, and other sturdy cardboard containers can serve as the foundation for your track or be used to build additional structures like towers, bridges, and obstacles.
Tape: Masking tape, duct tape, and clear packing tape are crucial for securing different elements of your track together. Double-sided tape can also be handy for attaching smaller pieces or decorations.
Scissors or Craft Knife: These tools are essential for cutting cardboard and shaping your track components. Always exercise caution and supervise children when using sharp tools.
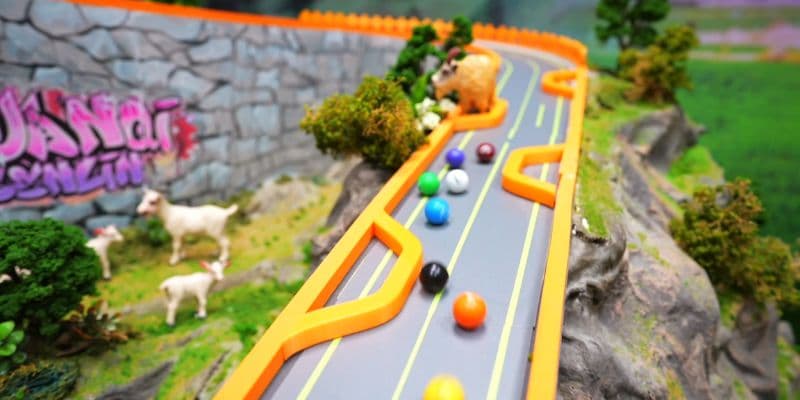
Marbles: No marble race track is complete without the marbles! Collect marbles in different sizes, colors, and materials. Glass marbles are popular for their smooth roll, but steel or ceramic marbles can provide a different feel.
Optional Enhancements
Wooden Planks or Blocks: Use these for a sturdy base or to create elevated sections. Wood adds elegance and durability to your creation.
Foam Pipe Insulation: This flexible material is perfect for creating tunnels, cushioned landings, and soft barriers to prevent marbles from going astray.
Plastic Tubing or Gutters: Flexible plastic tubing or gutters can create long, winding track sections. They’re also great for outdoor tracks as they are weather-resistant.
Popsicle Sticks: These versatile sticks are ideal for building bridges, gates, or a marble-launching catapult!
Plastic Cups or Containers: Cut the bottoms off plastic cups to create funnels that narrow the marbles’ path, or use them as catch basins at the end of the run.
Other Household Items: Get creative! Look around your house for items that could be repurposed for your marble run. Straws, bottle caps, LEGO bricks, pool noodles, and even kitchen utensils can all be used to create unique obstacles and features.
Decorative Elements: Personalize your track with paint, markers, stickers, glitter, or any other craft supplies you have on hand to add a pop of color.
Tips for Finding Materials
Raid the Recycling Bin: Before buying anything new, check your recycling bin for cardboard tubes, boxes, and other reusable items. It’s an environmentally conscious and cost-effective approach.
Shop Your Home: Look around your house for potential marble run materials. Old toys, cardboard packaging, and kitchen utensils can all be repurposed into exciting track components.
Visit the Hardware Store: A trip to the hardware store can be fruitful for specific materials or more complex features. You can find wood, metal rods, or even small motors to create moving parts.
Check Online Retailers: Many online retailers offer marble run kits and accessories, providing a convenient way to expand your collection and try new designs.
You can create a unique DIY marble race track that reflects your creativity by being resourceful and using your imagination.
Step-by-step guide to build your first track
Get ready to unleash your inner engineer with this step-by-step guide to building your own marble race track, from conceptualization to the thrilling moment your marbles cross the finish line.
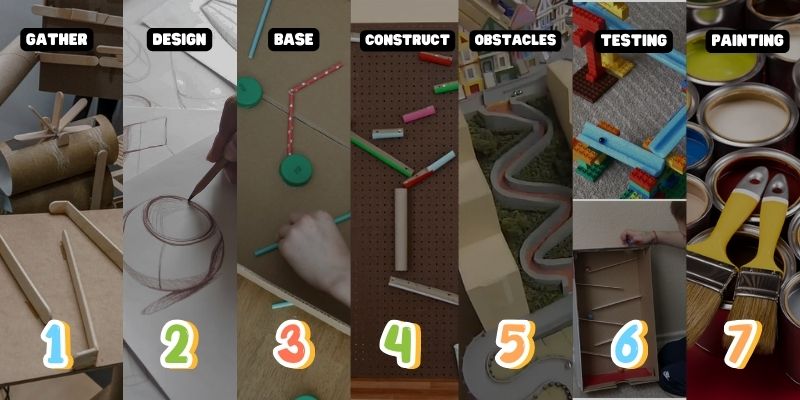
Gather Your Building Blocks
Start by collecting the essential materials:
- Cardboard Tubes: These form the backbone of your track and come in various sizes, perfect for creating ramps, chutes, and tunnels.
- Cardboard Boxes: Provide a sturdy base and can be used to create platforms, obstacles, and decorative elements.
- Tape: Secure the components with masking or duct tape, or use clear packing tape for a cleaner look.
- Scissors or a Craft Knife are essential for cutting and shaping cardboard. Always prioritize safety and supervise children when using sharp tools.
- Marbles: Gather an assortment of marbles in different sizes and materials for a dynamic race.
- Optional Extras: Wooden planks, foam pipe insulation, plastic tubing, popsicle sticks, hot glue, paint, markers, and other creative materials.
Design Your Dream Track
Visualize your track by sketching out your design on paper. Consider the overall shape, the number of levels, and the obstacles you want to include. Choose a theme, whether a jungle adventure, a construction zone, or a scary demon race track, to guide your design choices and make the track more engaging. Mark your starting and finishing lines, ensuring a clear path for the marbles.
Build the Base
Create a sturdy foundation by reinforcing a cardboard box with extra layers of tape or by cutting wood or foam board to your desired size and shape. Use cardboard tubes, wooden blocks, or other sturdy objects as support columns to elevate track sections and create multi-level designs.
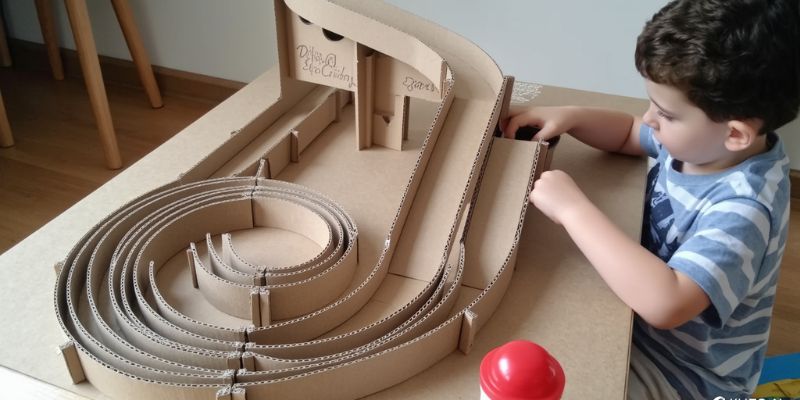
Construct the Race Course
Start building the race course by following these steps:
- Ramps: Cut cardboard tubes in half lengthwise to create ramps. Secure them to the base with tape or hot glue, ensuring smooth transitions for the marbles. Experiment with different angles and lengths to control speed.
- Chutes: Roll cardboard into tubes or create U-shaped channels to guide the marbles. Plastic tubing or gutters can be used for longer, enclosed sections.
- Curves: Gently bend cardboard strips and secure them with tape to create curves. Use flexible tubing or cut notches in the cardboard for tighter turns and interlock the pieces.
- Crossovers: Use multiple tubes or ramps to create intersections where marbles can cross over or under each other.
Add Thrills with Obstacles
Enhance your track with exciting obstacles:
- Jumps: Cut gaps in the track and use cardboard or blocks to create ramps on either side.
- Loops: Roll and tape cardboard strips into loops and secure them to the track.
- Funnels: Cut the bottom off a plastic cup or use a cardboard cone to create a funnel that narrows the marbles’ path.
- Spinners: Attach a cardboard circle to a dowel or skewer and secure it to the track, adding unpredictability.
- See-saws: Create tilting platforms using cardboard and a fulcrum.
- Gates: Use popsicle sticks or cardboard flaps to create gates that can be opened or closed.
- Waterfall: Create a waterfall effect using a plastic bottle with holes or a piece of plastic wrap.
- Sand Trap: Fill a section of the track with sand to slow down the marbles.
Test and Refine Your Track
Conduct trial runs by rolling marbles down the track to test their functionality and identify any areas where they get stuck or fall off. Adjust the layout, angles, or obstacles to ensure smooth marble flow and an exciting race experience.
Unleash Your Inner Artist
Decorate your track by painting, coloring, or adding themed decorations. Use miniature figurines, plants, or other decorative elements to bring your track to life.
By following these steps and unleashing your creativity, you’ll build a unique and exciting marble race track that provides hours of fun and learning for the whole family. Enjoy the process of creating your own gravity-powered masterpiece!
Testing and troubleshooting your DIY marble race track
Your marble race track is built, but the real excitement begins when you put it to the test! Thorough testing and troubleshooting are essential to ensure smooth races, identify potential issues, and optimize your track’s performance. Let’s dive into the process of fine-tuning your creation.
Test Runs: More Than Just Fun
Testing your track isn’t just about watching marbles roll; it’s about gathering valuable data and insights. As you run your marbles through the track, pay attention to the following
- Smooth Flow: Ensure the marbles roll freely through the entire track without getting stuck or derailed.
- Consistent Speed: Observe if the marbles maintain a consistent speed throughout the track or if there are sections where they unexpectedly slow down or speed up.
- Obstacle Performance: Check that the obstacles function as intended and that marbles make precise jumps, navigate loops, and pass through funnels without difficulty.
- Fairness: If your track has multiple lanes, ensure each lane provides similar speeds and challenges for the marbles.
Identifying and Addressing Common Issues
Even the most carefully crafted tracks can encounter a few hiccups. Here are some common issues and their solutions
Marbles Getting Stuck
- Causes: Rough edges, gaps between track sections, or too tight of a curve.
- Solutions: Sand down rough edges, fill gaps with tape or cardboard or widen the curve.
Marbles Flying Off the Track
- Causes: Ramps or jumps that are too steep, inadequate landing zones, or marbles traveling too fast.
- Solutions: Adjust the angle or height of ramps, add barriers or guardrails, or use heavier marbles that are less likely to bounce.
Inconsistent Speed
- Causes: Uneven track surface, debris on the track, or inconsistent slope angles.
- Solutions: Clean the track thoroughly, ensure the track is level, and adjust ramp angles for a consistent slope.
Uneven Lanes
- Causes: Differences in track length, obstacle placement, or friction levels.
- Solutions: Measure and adjust the length of each lane to ensure they’re equal, and distribute obstacles evenly across all lanes.
Advanced Troubleshooting Techniques
Slow-Motion Test: Record a video of a marble rolling through your track and play it back in slow motion. This can help you pinpoint areas where the marble loses momentum, bounces, or encounters other issues.
Marble Swap Test: Try racing different types of marbles (glass, steel, ceramic) on your track. Observe how each marble behaves and adjust your track design accordingly.
Expert Consultation: Seek advice from experienced marble run builders online or in your community. They can offer valuable insights and troubleshooting tips based on their own experiences.
Maintaining Your Track for Optimal Performance
Regular maintenance ensures your marble race track continues providing smooth and exciting races for years. Keep your track in top condition with these tips:
- Regular Cleaning: Wipe down your track regularly to remove dust, debris, and any sticky residue that can affect the marbles’ movement.
- Check for Damage: Inspect your track for any signs of wear and tear, such as warped pieces or loose connections. Repair or replace damaged parts promptly.
- Proper Storage: When not in use, store your marble run in a clean, dry place to prevent damage from dust, moisture, or pests.
By following these testing and troubleshooting tips, you can transform your DIY marble race track into a finely tuned machine that delivers hours of fun and excitement. Remember, the process of testing and refining is just as important as building the track itself. Through this iterative process, you’ll truly master the art of marble run design and create a track that you can be proud of.
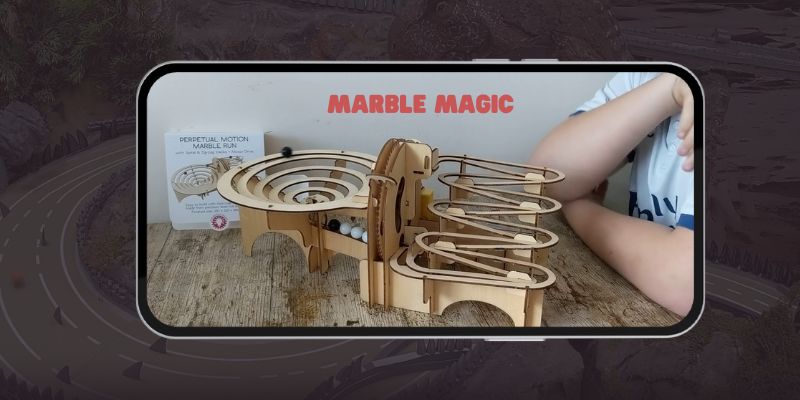
Share your DIY marble race track with Marble Magic
Your DIY marble race track is a testament to your creativity and engineering skills. It’s time to showcase your masterpiece and inspire others in the marble racing community! Marble Magic is the perfect platform to share your creations and connect with fellow enthusiasts.
Why Share Your Track with Marble Magic?
Sharing your work on Marble Magic offers several benefits:
- Inspire Others: Your unique design and innovative ideas might spark creativity in other builders, encouraging them to try new things and push their boundaries.
- Get Feedback: Receive valuable feedback and constructive criticism from experienced builders and racers, helping you improve your skills and create even more exciting tracks.
- Join the Community: Connect with other marble racing enthusiasts, make new friends, and become part of a vibrant and supportive community.
- Showcase Your Talent: Let your creativity shine by sharing your work with a broader audience, showcasing your skills and passion for marble racing.
How to Share Your Track with Marble Magic
There are several ways to share your DIY marble race track with us and the world:
Social Media
Share on Instagram, Facebook, or Twitter: Post photos or videos of your track and tag us @MarbleMagic. Use relevant hashtags like #DIYMarbleRaceTrack, #MarbleRacing, and #MarbleMagic.
Participate in Challenges: Join our regular DIY marble race track challenges to submit your creations for a chance to win prizes and recognition.
Marble Magic Website
Submit Your Track: Visit our website and fill out our submission form to share your track design, photos, and videos.
Join the Forum: Connect with other builders and racers on our community forum, where you can share your creations, ask questions, and exchange ideas.
YouTube
Create Your Own Channel: Start a YouTube channel dedicated to your marble run creations. Share videos of your tracks, races, and behind-the-scenes footage.
Collaborate with Other Creators: Connect with other marble run YouTubers and collaborate on videos or challenges.
What to Include When Sharing Your Track
When sharing your track, include the following:
- Photos and Videos: High-quality photos and videos showcase your track from different angles and highlight its unique features.
- Detailed Description: Explain the design of your track, the materials you used, and any unique mechanisms or obstacles you incorporated.
- Your Inspiration: Share the inspiration behind your design, whether it’s a specific theme, a real-world location, or a personal experience.
- Building Tips: Offer advice and tips to other builders who might want to create a similar track.
By sharing your DIY marble race track with Marble Magic, you’re not just showcasing your creativity but contributing to a thriving community of passionate enthusiasts who love to build, race, and share their creations. Join us, and let’s celebrate the joy of marble racing together!