Marble runs are more than just toys; they’re exciting adventures waiting to be built! With a few simple materials and a dash of imagination, you can create your own thrilling marble raceway. This hands-on activity is perfect for children and adults alike, sparking creativity, encouraging problem-solving, and providing hours of entertainment.
In this guide, we’ll dive into the world of DIY marble runs, providing you with step-by-step instructions, helpful tips, and creative ideas to bring your vision to life. Get ready to transform everyday household items into a gravity-defying masterpiece!
Why build a DIY marble run
Building your own DIY marble run is more than just creating a fun toy, it’s an adventure in creativity, engineering, and learning. Regardless of age, condition, social status, or whether you are a parent seeking an engaging activity for your kids or an adult looking for a stimulating hobby, DIY marble run offers a multitude of benefits beyond simple entertainment.
Unleash Your Creativity
A DIY marble run is a blank canvas for your imagination. Without the constraints of pre-designed pieces or instructions, you have the freedom to create a unique track that reflects your individual style and interests. Experiment with different layouts, obstacles, and themes to build a marble run that’s truly one-of-a-kind.
Ignite a Passion for STEM Learning
Marble runs are more than just toys; they’re interactive science labs. As you build your track, you’ll explore physics concepts like gravity, momentum, and friction in a hands-on way. You’ll learn about angles, slopes, and the importance of structural integrity. This playful experimentation can spark a lifelong interest in STEM subjects and foster critical thinking skills.
Boost Problem-Solving and Engineering Skills
Building a marble run isn’t always a smooth ride. You’ll likely encounter challenges like marbles getting stuck, falling off the track, or not reaching the finish line. These hurdles provide valuable opportunities for problem-solving and engineering. You’ll need to analyze the issue, brainstorm solutions, and test different approaches to get your track running smoothly. This iterative process builds resilience and teaches valuable life skills.
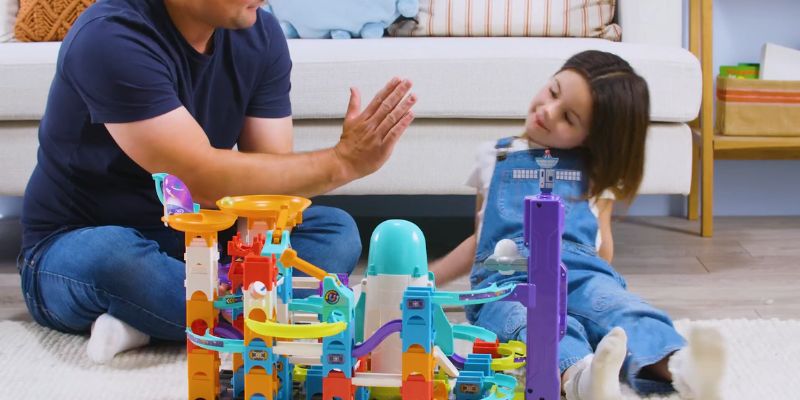
Foster Family Fun and Bonding
Building a marble run is a perfect activity for family bonding. Gather your loved ones, brainstorm ideas, and work together to create a shared masterpiece. The collaboration, laughter, and sense of accomplishment will create lasting memories. Plus, it’s a great way to spend quality time together away from screens and distractions.
Save Money and Reduce Waste
DIY marble runs are incredibly budget-friendly. You can use readily available household items like cardboard tubes, boxes, straws, and other recyclables. This not only saves you money but also reduces waste and teaches children the importance of sustainability and resourcefulness.
Personalize and Customize Your Creation
One of the greatest joys of DIY marble runs is the ability to personalize your creation. You can choose your favorite colors, themes, and materials to create a track that truly reflects your style. Decorate your track with paint, markers, stickers, or even miniature figurines to make it a unique and personal expression of your creativity.
Embrace the Joy of Creation
There’s something deeply satisfying about building something with your own hands. A DIY marble run is a tangible representation of your ingenuity and effort. It’s a source of pride and accomplishment, and it’s sure to spark joy every time you watch a marble race down the track.
Whether you’re a parent, teacher, or simply a lover of all things DIY, building a marble run is an incredibly rewarding experience. So, roll up your sleeves, gather your materials, and let your creativity flow!
Gather material for your DIY marble run
Creating your own marble run is like embarking on a creative scavenger hunt through your home. Everyday items, often destined for the recycling bin, can be transformed into the building blocks of a gravity-powered masterpiece. Here’s your checklist of essential and optional materials to gather
Essential Building Blocks
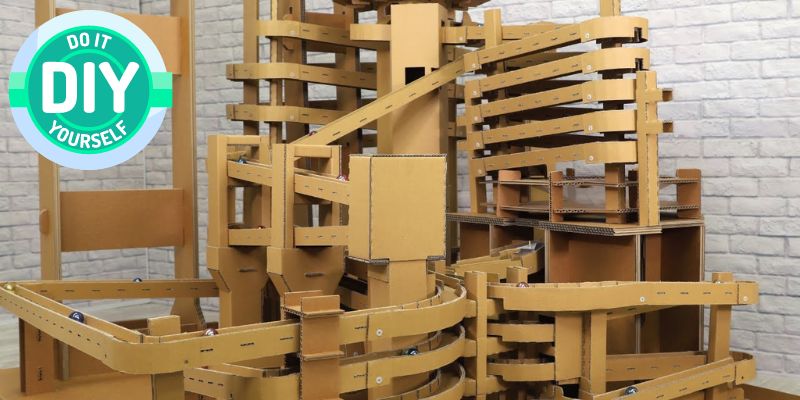
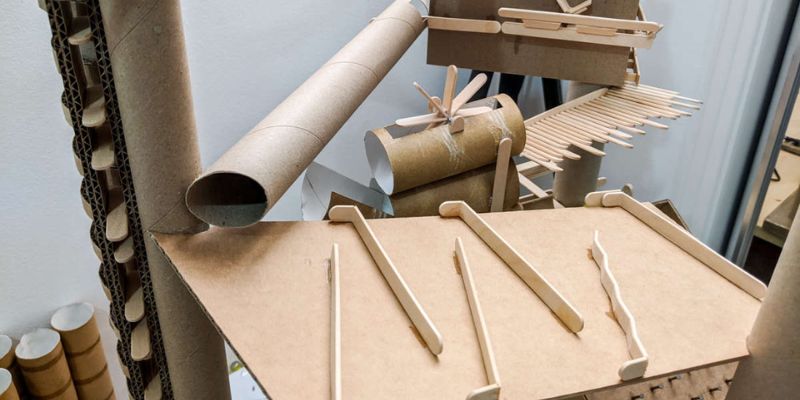
Cardboard Tubes: These cylindrical wonders are the backbone of your marble run. Gather a variety of sizes, from short and sturdy toilet paper rolls to long and wide wrapping paper tubes. Don’t forget the cardboard cores from aluminum foil and plastic wrap, they make great connectors and supports.
Cardboard Boxes: Cereal boxes, shoeboxes, and other sturdy cardboard containers provide a solid base for your track and can be cut and shaped into ramps, platforms, and various obstacles.
Tape: A roll of masking tape or duct tape is your trusty adhesive for securely joining your cardboard pieces together. Clear packing tape can also be used for a cleaner look.
Scissors or Craft Knife: These tools are essential for cutting cardboard and shaping your track elements. Remember to always supervise children when using sharp tools.
Marbles: The stars of the show! Gather a collection of marbles in different sizes, colors, and materials to experiment with their rolling behaviors and add visual appeal to your race.
Optional Enhancements
Wooden Planks or Blocks: These can serve as a sturdy base for larger tracks or as building blocks for complex structures.
Foam Pipe Insulation: This flexible material is perfect for creating tunnels, cushioned landings, and soft barriers to prevent marbles from going astray.
Plastic Tubing: Flexible plastic tubing or even old garden hoses can be used to create winding pathways and enclosed tunnels.
Popsicle Sticks: These versatile sticks are great for building bridges, gates, and other small-scale structures.
Plastic Cups: Cut the bottoms off plastic cups to create funnels that narrow the marbles’ path or use them as catch basins at the end of the run.
Other Household Items: Get creative! Look around your house for other items that could be repurposed for your marble run. Straws, bottle caps, plastic containers, LEGO bricks – the possibilities are endless!
Decorative Elements: Add a touch of personality to your creation with paint, markers, stickers, glitter, or any other craft supplies you have on hand.
Tips for Gathering Materials
Raid the Recycling Bin: Before you buy anything new, check your recycling bin for cardboard tubes, boxes, and other reusable items. This is a great way to be environmentally conscious and save money.
Visit the Hardware Store: If you’re looking for specific materials or want to add more complex features to your marble run, a trip to the hardware store can be fruitful.
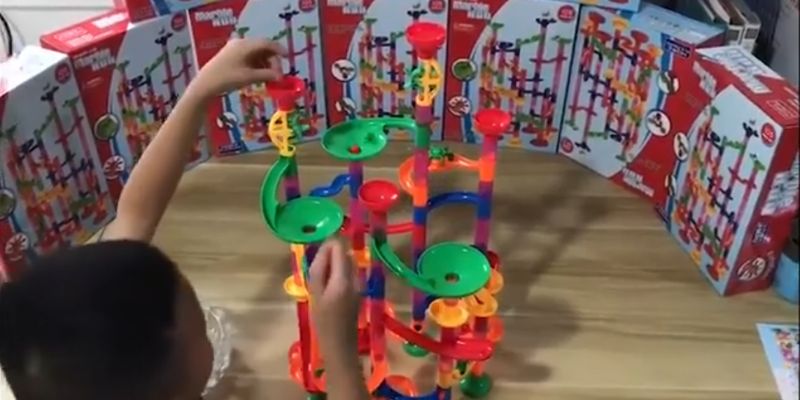
Explore Online Resources: Many online retailers offer marble run kits and accessories, providing a convenient way to expand your collection and try new designs.
Remember, the key is to have fun and be resourceful! With a little creativity and imagination, you can turn everyday household items into a thrilling marble race track that will provide hours of entertainment and learning.
Planning Your Marble Run Design
Before diving into the exciting world of marble run construction, it’s crucial to lay a solid foundation with a well-thought-out plan. This planning stage is where your creativity and engineering skills come together to create a masterpiece. Here’s how to approach the design process and turn your ideas into a gravity-powered reality
Brainstorming and Ideation
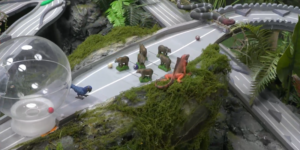
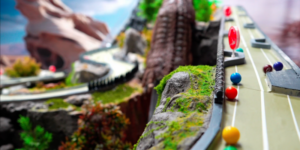
Unleash Your Creativity: Let your imagination run wild! Think about the type of marble run you want to build. Will it be a towering structure with multiple levels, a winding path through a jungle landscape, or perhaps a miniature city with intricate roads and bridges? There are no limits to what you can create.
Seek inspiration from the world around you, observing natural landscapes, architectural structures, or everyday objects. Browse online for marble run designs or check out books and magazines for ideas. Choosing a theme can give your marble run a unique personality and direction, with popular themes including space, jungle, construction, medieval, or candy land.
Sketching Your Vision
Put Pencil to Paper: Once you have some ideas, start sketching your marble run design on paper. This doesn’t need to be perfect; it’s just a rough draft to help visualize the layout. Map out the path the marbles will take, including ramps, curves, and any obstacles you want to include. Experiment with different configurations to see what works best, considering the available space and the types of materials you’ll be using.
Selecting Materials
Choose Wisely: The materials you select will impact the look, feel, and functionality of your marble run. Cardboard is a popular choice for its affordability and versatility, allowing you to easily cut, bend, and shape it to create various track elements. Wood offers a more durable option with a classic aesthetic that can be sanded and painted to match your theme.
Plastic is lightweight and available in various colors and shapes, making it ideal for creating smooth tracks and adding visual appeal. Recycled materials, such as toilet paper rolls, paper towel tubes, and plastic bottles, can be repurposed for a sustainable and creative approach.
Considering the Mechanics
Gravity is the driving force behind your marble run. Ensure your track has a downward slope so the marbles can roll freely. Momentum is another key factor; think about how the marbles will gain and lose momentum as they travel through the track.
Steeper slopes will create more speed, while obstacles like funnels and jumps can slow them down. Friction also plays a role, as different materials will create varying levels of friction. Choose materials that offer the right amount of friction to keep the marbles rolling smoothly without getting stuck.
Planning for Obstacles
Jumps and Drops: These exciting elements add a thrill factor to your marble run. Consider the height and distance of jumps, and ensure a safe landing zone. Curves and Loops: These can be tricky to build but add a lot of visual interest and challenge to the track.
Funnels and Spinners: These obstacles create bottlenecks and unpredictable changes in direction, adding suspense to the race. Interactive Elements: Think about adding interactive elements like levers, switches, or trapdoors to make your marble run even more engaging.
By carefully considering these aspects of design, you’ll be well on your way to creating a unique and exciting marble run that will provide hours of entertainment and learning. So, gather your materials, sketch your ideas, and let your creativity flow!
Building Your Marble Run
You’ve gathered your materials, finalized your design, and the anticipation is building. Now comes the most exciting part: transforming your marble run vision into a gravity-powered masterpiece! Whether using a pre-made kit or going full DIY, this step-by-step guide will help you create an engaging and thrilling marble run.
Step 1: Constructing the Base
Choosing Your Base: Select a sturdy, level surface for your base. This could be a cardboard box, a wooden plank, a piece of foam board, or even a table. The size of your base will depend on the scale of your marble run design.
Assembling the Base (If Using a Kit): Most marble run kits come with pre-cut base pieces that snap or lock together easily. Follow the instructions provided to assemble your base securely.
Reinforcing (If Building from Scratch): If you’re building a DIY track, reinforce your cardboard or foam board base with additional layers or strips of tape to ensure it’s strong enough to support the weight of your track and marbles.
Step 2: Creating the Tracks and Ramps
Ramps: Ramps are the heart of your marble run, propelling the marbles down the track.
- Cardboard Tubes: Cut cardboard tubes in half lengthwise and tape them to the base at an angle to create ramps.
- Wood or Foam Board: Cut and shape wooden planks or foam board into ramps, ensuring they are smooth and securely attached to the base.
- Plastic Tubing or Gutters: These materials can be used to create longer, curved ramps or for outdoor tracks.
Chutes: Chutes guide the marbles along a specific path, often at high speeds.
- Cardboard: Roll cardboard into tubes or fold it into V-shapes to create chutes.
- Plastic Tubing: Use flexible plastic tubing or gutters to create enclosed chutes.
- Funnels: Cut the bottom off plastic cups or use cardboard cones to create funnels that narrow the marbles’ path.
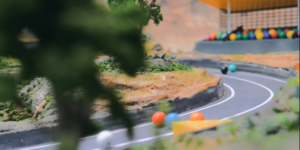
Curves: Curves add excitement and challenge to the race.
- Cardboard Strips: Gently bend and tape cardboard strips to create curves.
- Flexible Tubing: Use flexible tubing for smooth, flowing curves.
- Wooden Dowels: Bend thin wooden dowels and secure them to the base for more permanent curves.
- Notched Cardboard: Cut small notches along the edges of cardboard strips, allowing you to bend them into tighter curves.
Step 3: Adding Obstacles and Features
Jumps: Create gaps in the track for the marbles to leap across. Use cardboard, blocks, or other materials to build ramps on either side of the gap.
Loops: Carefully roll and secure cardboard or flexible tubing into loop shapes and attach them to the track. Ensure the loop is wide enough and has a gradual incline so the marbles can complete it without falling out.
Spinners: Attach cardboard circles or old CDs to a skewer or dowel and secure it to the track. The spinning motion adds an element of unpredictability to the race.
Diverters: Create Y-shaped sections where the track splits into two paths. You can add a lever or other mechanism to control which path the marble takes.
Other Obstacles: Get creative and experiment with other obstacles, such as:
- Zigzags: Create a series of sharp turns to test the marbles’ agility.
- See-saws: Design a tilting platform that can change the marbles’ direction.
- Plinko Boards: Let the marbles bounce down a board with pegs.
- Waterfall: Use a plastic bottle with holes or a piece of plastic wrap to create a cascading waterfall.
- Sand Trap: Fill a section of the track with sand to slow down the marbles.
Step 4: Testing and Refining
Once you’ve built your track, it’s time to put it to the test!
Roll Test: Send a few marbles down the track and observe their journey. Do they roll smoothly? Do they get stuck or fly off at certain points?
Adjustments: Make necessary adjustments to the track layout, angles, or obstacles to ensure the marbles flow smoothly and the race is challenging but not impossible.
Step 5: Decorate and Personalize
Let Your Creativity Shine: Paint, color, or decorate your track to match your chosen theme.
Add Details: Use miniature figurines, plants, or other decorative elements to bring your track to life.
Building your own marble race track is a rewarding and educational experience. Enjoy the process of creating a unique and exciting raceway for your marbles!
Additional tips for your DIY marble run
Once you’ve mastered the fundamentals of building a marble run, it’s time to take your creations to the next level. These additional tips and tricks will help you elevate your DIY marble run game, ensuring a smoother, more exciting, and visually stunning experience for both you and your marbles.
Fine-Tuning the Flow
Slope Adjustments: Experiment with different angles and lengths of ramps to control the speed and flow of the marbles. Steeper angles lead to faster speeds, while gentler slopes offer more controlled descents. Aim for a balance that keeps the marbles moving without them flying off the track.
Smooth Transitions: Ensure smooth transitions between different track sections to prevent marbles from getting stuck or jumping off. Use sandpaper to smooth out rough edges, and secure all connections with ample tape or hot glue.
Strategic Placement of Obstacles: Think carefully about where to place obstacles like funnels, jumps, and spinners. Space them out evenly to avoid creating bottlenecks or areas where marbles get stuck.
Enhancing the Aesthetics
Paint and Decorations: Transform your marble run into a work of art! Paint the cardboard tubes, boxes, and other elements with bright colors or intricate patterns.
Thematic Elements: Decorate your track to match a specific theme. For example, use green paper and plastic plants for a jungle theme, or paint planets and stars for a space-themed track.
Miniature Figures and Props: Add small figurines, toy animals, or other objects to create a more immersive and engaging experience.
Troubleshooting Common Issues
Marbles Getting Stuck: Check for rough edges or gaps in the track and smooth them out with sandpaper or fill them with tape or cardboard. Ensure that funnels and other narrow passages are wide enough for the marbles to pass through smoothly. If your track has multiple levels, make sure the ramps are angled correctly so the marbles don’t lose momentum and come to a stop.
Marbles Flying Off the Track: Adjust the angle of the ramps or jumps to reduce the marbles’ speed. Add barriers or guardrails to the sides of the track to prevent marbles from falling off. Use heavier marbles that are less likely to bounce or veer off course.
Inconsistent Speed: Make sure your track is level and that there are no bumps or obstructions. Experiment with different materials for the track surface to find one that offers the right amount of friction. Consider using a lubricant like graphite powder on wooden tracks to reduce friction (use sparingly).
Maintenance and Care
Keep It Clean: Dust and debris can accumulate on the track, causing friction and slowing down the marbles. Regularly clean your marble run with a soft cloth or brush.
Check for Damage: Inspect your track for any signs of wear and tear, such as loose connections, warped pieces, or broken obstacles. Make repairs as needed to ensure continued enjoyment.
Storage: When not in use, store your marble run in a safe and dry place to prevent damage. If your track is large, consider disassembling it for easier storage.
By following these additional tips, you can ensure that your DIY marble run is not only fun and exciting but also well-maintained and built to last. With a little care and attention, your creation can provide hours of enjoyment for you and your family for years to come.